

The Essential Guide to Interior Room Painting
Interior room painting done right can completely transform a space — but it’s easy to end up with drips, streaks, or colors that look nothing like the swatch.
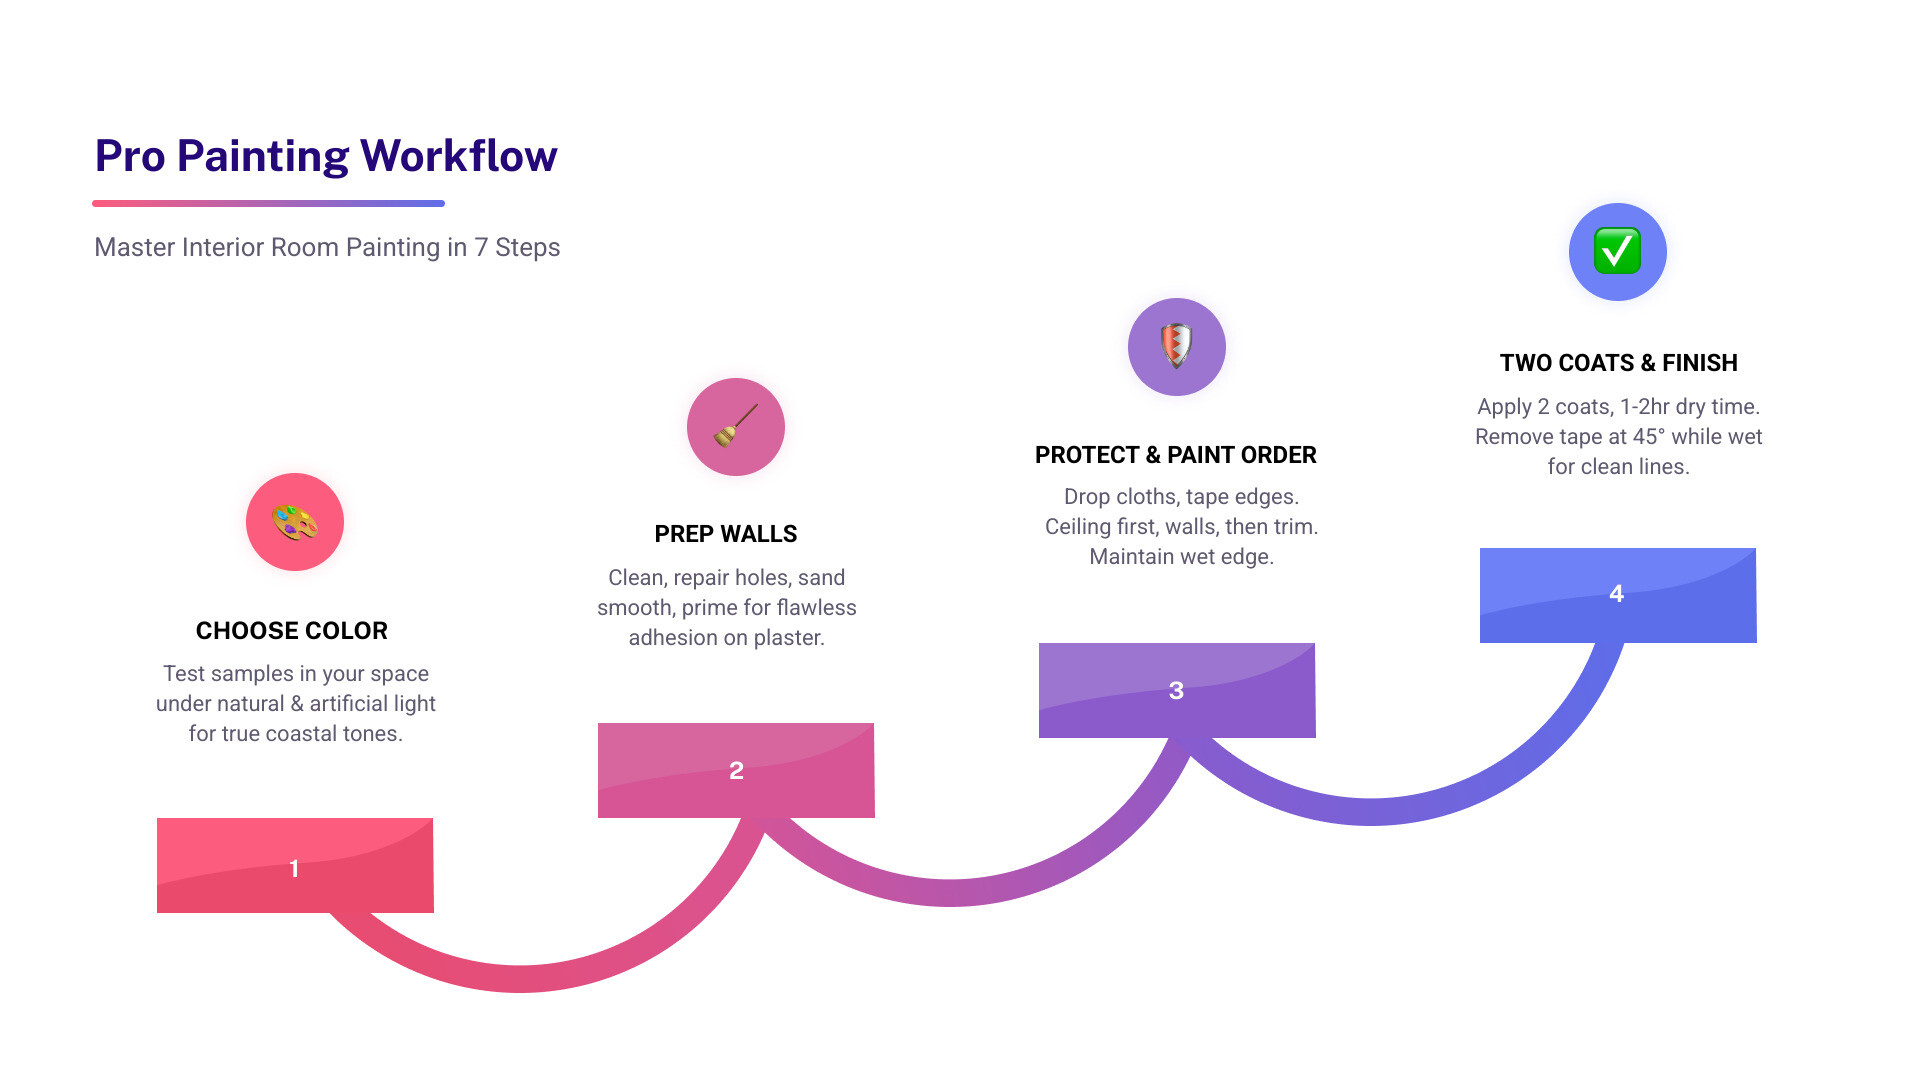
Here’s a quick overview of how to paint a room the right way:
- Choose your color — test samples in your actual space under different lighting conditions
- Select the right finish — eggshell or satin for most rooms; semi-gloss for kitchens and bathrooms
- Prep your walls — clean, repair holes, sand smooth, and prime where needed
- Protect the room — lay drop cloths, tape edges, remove outlet covers
- Paint in order — ceiling first, then walls, then trim
- Apply two coats — wait 1-2 hours between coats for full, even coverage
- Remove tape carefully — peel at a 45-degree angle while the final coat is still slightly wet
Most projects take 2-3 days from prep to finish. One gallon of paint covers roughly 400 sq ft in a single coat — or 200 sq ft with two coats, which is the standard for a quality result.
Rhode Island homes come with their own set of challenges — historic plaster walls, coastal humidity, and New England’s shifting natural light all affect how paint looks and holds up over time. Getting it right takes more than a roller and a weekend.
I’m Douglas Smyth, founder of Smyth Painting Co., and I’ve spent nearly two decades mastering interior room painting across Newport County and greater Rhode Island — from historic properties to modern coastal homes. In this guide, I’ll share the professional techniques and hard-won insights that separate a clean, lasting finish from a frustrating redo.
Learn more about interior room painting:

When we talk about interior room painting, we aren’t just talking about changing a wall color. We are talking about protecting your home and creating an atmosphere that reflects your style. In our region, from the historic streets of Newport to the breezy shores of Little Compton, the salt air and high humidity can be tough on interior surfaces. Using high-quality materials isn’t just a luxury; it’s a necessity for a finish that lasts.
To get started, you need to understand the math of paint. A standard rule of thumb is that one gallon of paint covers about 400 square feet with a single coat. However, almost every professional project requires two coats for full, vibrant coverage. This means for a typical 12×12 bedroom, you’ll likely need two gallons to ensure the color is deep and the sheen is uniform.
Your toolkit is your best friend. Beyond the paint itself, we recommend:
- High-quality angled sash brushes (2.5-inch is the “gold standard” for cutting in)
- 9-inch rollers with a 3/8-inch nap for smooth walls
- Extension poles (to save your back and ensure steady pressure)
- Canvas drop cloths (never use plastic on floors—it’s a slip hazard and tracks wet paint everywhere)
- Spackling compound and a 220-grit sanding block
For more detailed technical advice on wall application, you can explore this guide on How to Paint Perfect Interior Walls For Any Room | Benjamin Moore.
Choosing the Right Palette for Rhode Island Interior Room Painting
Selecting a color is often the most stressful part of the process. We’ve seen many homeowners in Barrington and Narragansett fall in love with a swatch at the store, only to realize it looks completely different in their living room. This happens because of the “Golden Rule” of lighting: direct sunlight shows true color, while indirect light makes colors appear warmer, and artificial light can shift tones significantly.
In Rhode Island, our light is unique. Coastal homes often deal with a cool, blue-tinted light reflecting off the Atlantic. This can make cool grays look icy and warm beiges look muddy. To avoid this, we recommend applying paint samples to a movable piece of foam core rather than the wall itself. This allows you to move the sample around the room to see how it looks in dark corners versus next to a window at different times of the day.
If you are feeling overwhelmed by the thousands of options in a fan deck, we offer professional Color Consultation Services to help narrow down the field. You can also check out our research on the Top Colors Trending in Rhode Island Homes and Businesses for local inspiration, ranging from classic Navy to soft, airy neutrals.
Selecting Finishes for Coastal Humidity
The “sheen” or finish of your paint is just as important as the color. In high-humidity areas like Middletown and Jamestown, the wrong finish can lead to mildew growth or walls that are impossible to clean.
Here is a quick breakdown of how we select finishes:
- Flat/Matte: Best for ceilings and adult bedrooms. It hides imperfections in older plaster walls but is the hardest to clean.
- Eggshell: The “all-purpose” finish. It has a soft glow and works well in living rooms and dining areas.
- Satin: A step up in durability. We often recommend this for hallways and kids’ rooms where fingerprints are a daily reality.
- Semi-Gloss: Essential for kitchens, bathrooms, and trim. It resists moisture and can be scrubbed without damaging the paint.
Because we care about the air quality in your home, we often steer clients toward our Eco-Friendly Interior Paint Ultimate Guide. Low-VOC and Zero-VOC paints have come a long way; they provide the same durability as traditional paints without the harsh chemical “new paint smell” that can linger for weeks. For more help deciding, see our Paint Finishes A Simple Guide.
Professional Preparation and the Order of Operations
If you skip the prep, you’re just wasting expensive paint. Professional interior room painting is 70% preparation and 30% application. In our historic New England homes, this often means dealing with layers of old paint or delicate plaster.
The Smyth Painting Order of Operations:
- Clear the Space: Move furniture to the center and cover it with plastic. Cover the floors with heavy-duty canvas drop cloths.
- Clean the Walls: Use a damp sponge to remove dust. In kitchens, use a degreaser or TSP (trisodium phosphate) to remove invisible grease films that prevent paint from sticking.
- Repair: Fill nail holes and cracks with spackle. Once dry, sand them flush with 220-grit sandpaper.
- Prime: If you are painting over a dark color, or if you’ve patched a large area, you must prime. Primer provides a uniform surface for the paint to “bite” into.
- Paint the Ceiling: Always start at the top. This way, any accidental splatters land on unpainted walls. See our Ceiling Painting Service Complete Guide for tips on handling textured or high ceilings.
- Paint the Walls: After the ceiling is dry.
- Paint the Trim: Finish with the baseboards, window casings, and doors. For a deep dive into this, check out our Trim Painting Service Ultimate Guide.
Mastering Interior Room Painting Techniques
To achieve a “flawless” look, you need to master two main skills: cutting in and rolling.
Cutting In: This is the process of painting the edges where the roller can’t reach—along the ceiling, corners, and trim. We use a 2.5-inch angled brush and work in small sections. The goal is to keep a “wet edge,” meaning you should never let your brushed-on paint dry before you roll over the edge of it. This prevents “picture framing,” where the edges look a different shade than the rest of the wall.
Rolling: Load your roller by dipping it into the tray and rolling it back and forth on the ramp until it’s evenly saturated but not dripping. Apply the paint in a large ‘W’ or ‘N’ pattern on the wall, roughly 3 feet wide. Then, without reloading the roller, fill in the gaps of the ‘W’. This ensures even distribution.
Most latex paints take about 1-2 hours to be dry to the touch, but we recommend waiting at least 4 hours before applying a second coat. And while it might look dry, keep in mind that latex paint takes about 30 days to fully “cure” to its maximum hardness.
For a professional touch, you can always look into our full Interior Painting Services.
Avoiding Common DIY Pitfalls and Messes
Even with the best intentions, DIY projects can get messy. One of the biggest mistakes is using cheap plastic drop cloths on the floor.
| Feature | Canvas Drop Cloth | Plastic Sheeting |
|---|---|---|
| Durability | High – Resists tears | Low – Punctures easily |
| Safety | Non-slip on most surfaces | Very slippery |
| Absorbency | Absorbs drips immediately | Paint stays wet (tracks everywhere) |
| Reusability | Lasts for years | Usually single-use |
Another common pitfall is “lap marks.” These occur when you paint over a section that has already started to dry. To avoid this, always work from the top of the wall to the bottom and maintain that wet edge.
When it comes to tape, we recommend blue painter’s tape. Press the edges down firmly with a putty knife to prevent “bleed.” The secret to a clean line is removing the tape while the paint is still slightly tacky—if you wait until it’s bone-dry, the tape might pull chips of the new paint off with it.
If you’ve already run into trouble, our guide on DIY Painting Pitfalls Common Mistakes Homeowners Make and How to Avoid Them can help you troubleshoot. You can also find additional professional finishing tips at How to Paint a Room for a Flawless Finish.
Finalizing Your Project and Knowing When to Call a Professional
Once the second coat is on and the tape is pulled, it’s time for the final details. Replace your outlet covers, move the furniture back (carefully!), and store your leftover paint. We recommend keeping at least a quart of each color for future touch-ups. Label the lid with the room name and the date it was painted.
When should you put down the brush and call us?
- Height and Complexity: If you have vaulted ceilings in a Newport estate or a complex grand staircase in South Kingstown, the safety risks and technical difficulty increase exponentially.
- Lead Safety: If your home was built before 1978 (which describes much of Bristol and Providence), there is a high chance of lead-based paint. We are RI and EPA Lead Certified, meaning we have the specialized equipment to handle lead dust safely.
- Time: A professional crew can often prep and paint an entire house in the time it takes a DIYer to finish one large room.
- Commercial Needs: For schools, churches, or property management companies, the scale of the project requires a level of coordination and speed that only a professional team can provide.
Post-Paint Care and Professional Support
Maintenance is key to keeping your home looking fresh. While latex paint is durable, we suggest waiting at least two weeks before wiping the walls with a damp cloth to allow the finish to harden.
Interestingly, many of our clients don’t realize that interior painting in the winter is actually an ideal time for projects in Southern New England. The lower humidity inside the home during the heating season allows paint to dry and cure more predictably. Plus, it’s a great way to beat the “winter blues” with a fresh new look while it’s snowing outside in Tiverton or Wickford. Learn more about the benefits of Interior Painting in the Winter.
At Smyth Painting Co., we pride ourselves on a stress-free experience. Whether you are in Warwick, East Greenwich, or Middletown, we bring high-quality, detailed work to every square inch of your home. If you’re ready to transform your space without the headache of doing it yourself, explore our Interior Painting Services and let us handle the heavy lifting.
We are proud to serve our neighbors throughout Rhode Island and Southeastern Massachusetts, ensuring that every home we touch stands up to the unique New England climate with beauty and grace.


