
Why Refinish Cabinets Without Stripping Is the Smart Choice
Refinish cabinets without stripping is a proven method that saves time, avoids harsh chemicals, and delivers professional results without the mess of traditional paint removal. Here’s what you need to know:
Quick Answer: The No-Strip Refinishing Process
- Clean thoroughly – Remove grease and grime with TSP solution
- Degloss the surface – Use liquid sandpaper or light scuffing (220-grit)
- Apply bonding primer – Ensures adhesion without stripping
- Add finish coats – 2-3 coats of paint or polyurethane
- Reassemble – Reattach hardware after 24-hour dry time
Time: 1-2 days | Skill Level: Easy (1/5) | Method: Chemical-free option available
If the paint on your kitchen cabinets is looking tired and outdated, you don’t need to commit to the time-consuming, chemical-heavy process of stripping them down to bare wood. Refinishing without stripping offers a cost-effective way to give old, worn-out cabinets a like-new appearance while keeping the project manageable for both DIYers and professionals.
The traditional approach—stripping, sanding, and starting from scratch—can take 2-3 days even for professionals who remove doors and spray off-site. But modern techniques using deglosser products and bonding primers let you work right in place, often completing the job in just one day.
This method works because it focuses on surface preparation rather than complete removal. By thoroughly cleaning, scuffing the existing finish to create adhesion, and applying modern bonding coatings, you can achieve a durable, factory-like finish. The process avoids the health risks of chemical strippers, eliminates the massive dust clouds from full sanding, and prevents the potential damage that comes from removing and reinstalling cabinet boxes.
The key is understanding that you’re not trying to remove the old finish—you’re preparing it to accept a new one. When done correctly, this approach delivers results that can last for years while saving significant time and money compared to full replacement.
I’m Douglas Smyth, founder of Smyth Painting Company, and since 2005 we’ve helped hundreds of Rhode Island and SE Massachusetts homeowners transform their kitchens through professional cabinet refinishing. During that time, we’ve refined our approach to refinish cabinets without stripping, focusing on techniques that deliver exceptional results while respecting your home and minimizing disruption.
How to Refinish Cabinets Without Stripping: A Step-by-Step Guide
Many homeowners ask us, “Can you really refinish cabinets without stripping or sanding them completely?” The answer is a resounding yes. In professional refinishing, we call this “chemical scuffing” or “deglossing.” Instead of using toxic methylene chloride or hours of back-breaking sanding to reach raw wood, we create a “mechanical bond” on the existing surface.

The process relies on high-adhesion products that are specifically engineered to stick to glossy, non-porous surfaces like old varnish or factory paint. When you refinish cabinets without stripping, you are essentially building a new, incredibly strong layer over the old one.
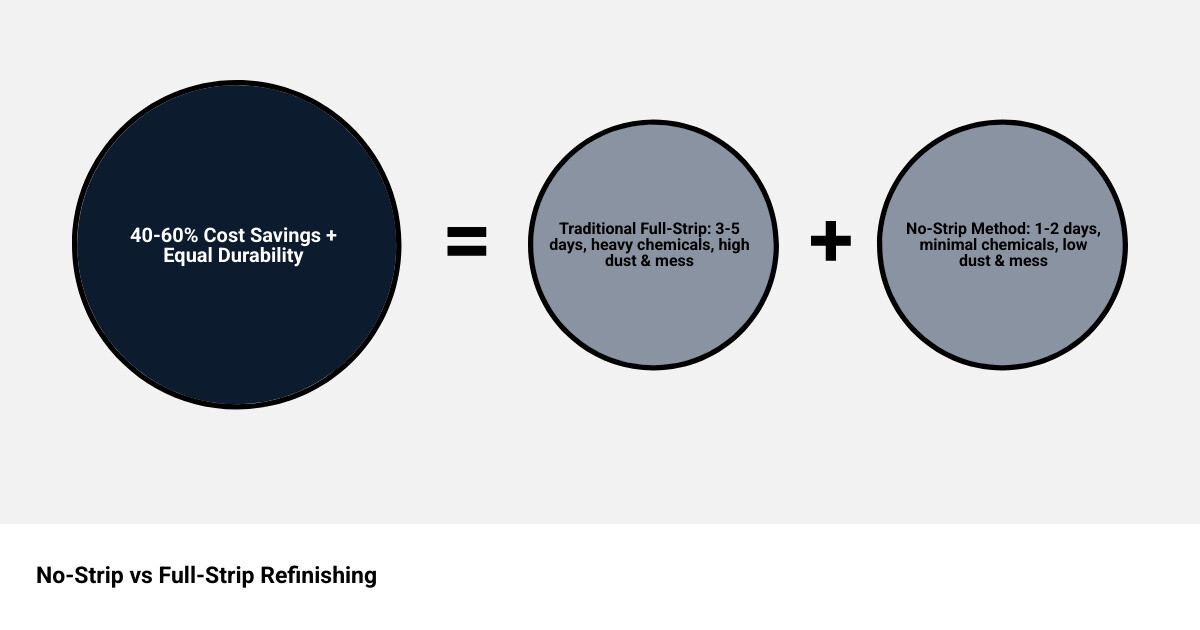
| Feature | Liquid Sandpaper (No-Strip) | Traditional Sanding/Stripping |
|---|---|---|
| Mess Level | Very Low (No dust) | Very High (Fine dust everywhere) |
| Time Required | 1-2 Days | 3-5 Days |
| Chemical Intensity | Mild (Deglosser) | High (Paint Strippers) |
| Surface Result | Smooth, uniform profile | Can be uneven if over-sanded |
| Labor Intensity | 1/5 (Easy) | 5/5 (Exhausting) |
Essential Tools to Refinish Cabinets Without Stripping
To get a professional result, you don’t need a warehouse full of machinery, but you do need the right kit. Most of these items are readily available at your local hardware store in places like Middletown or Portsmouth, RI.
- Cordless drill/driver: Essential for removing doors and hinges quickly.
- Screwdriver: For fine-tuning hinge adjustments during reassembly.
- Putty knife: Useful for scraping away any old, loose flakes of paint or applying wood filler.
- Synthetic-bristle paintbrush: A 2-inch angled brush is best for “cutting in” details.
- 220-grit and 320-grit sandpaper: For light scuffing between coats.
- Cheesecloth or lint-free rags: For applying deglosser and wiping down surfaces.
- Drop cloths and Painter’s tape: To protect your countertops and floors.
Preparing and Cleaning Your Cabinet Surfaces
Preparation is 90% of the job. In our experience providing cabinet refinishing in Providence, RI, the biggest cause of failure isn’t the paint—it’s the grease. Kitchens are oily environments. If you don’t remove the cooking oils and skin oils around the handles, your new finish will eventually peel.
- Label Everything: Before you pick up a drill, create a simple sketch of your kitchen. Number each door and drawer. Place a piece of painter’s tape with the corresponding number inside the cabinet box and on the back of the door (in the hinge hole is a great spot). This ensures everything goes back exactly where it belongs.
- The Deep Clean: Use a solution of Trisodium Phosphate (TSP) or a high-quality degreaser. Scrub the surfaces with a scouring pad. For particularly stubborn grease near the stove, mineral spirits can help break down the buildup.
- Hardware Removal: Remove all knobs, pulls, and hinges. If you’re planning on keeping your hinges, place them in labeled baggies so they return to the same door. This prevents “hinge sag” issues later.
Using Liquid Sandpaper Deglosser to Save Time
If you want to refinish cabinets without stripping, liquid sandpaper is your best friend. It is a chemical solution that “bites” into the existing finish, removing the gloss and creating a microscopic profile that paint can grab onto.
When we perform cabinet refinishing in Fall River, MA, we love this method because it produces zero dust. This is a huge benefit for families with allergies or those who don’t want to find sawdust in their cereal for the next month.
How to apply it:
- Pour a small amount of the deglosser onto a lint-free cloth or cheesecloth.
- Rub it onto the cabinet surface in a circular motion.
- Work in small sections so the product doesn’t dry before you’ve had a chance to wipe away the dissolved residue.
- The surface should go from shiny to a dull, matte finish almost instantly.
Applying Professional Coatings and Finishes
Once the surface is clean and deglossed, it’s time for the “magic” part of the makeover. You have two main paths: re-staining or painting.
Restaining Without Stripping Can you restain cabinets without sanding? Yes, by using “Gel Stains.” Unlike traditional stains that must soak into the wood fibers, gel stains sit on top of the existing finish. They are thick and opaque, allowing you to darken the wood or change the tone (like going from honey oak to a deep espresso) without removing the original varnish.
Painting for a Factory Finish If you are looking for a solid color, specialized “bonding primers” are the secret. These primers are designed to stick to glass, tile, and old finishes. For the best results, we recommend watching TRAINING VIDEOS to see the proper technique for HVLP (High Volume Low Pressure) spraying.
- The First Coat (Tack Coat): Apply a thin, even coat. Don’t worry about full coverage yet; this layer is all about adhesion.
- The Crosshatch Pattern: If spraying, move horizontally then vertically to ensure every edge is covered.
- Dry Times: Most modern coatings are “dry to touch” in 2 hours, but they need 24 hours to cure before you should handle them heavily.
- Topcoat: For maximum durability, especially in high-traffic kitchens, apply a polyurethane topcoat. This provides scratch resistance and makes the cabinets easy to wipe clean.
Common Mistakes to Avoid When You Refinish Cabinets Without Stripping
Even though this is a “1 out of 5” difficulty project, there are pitfalls. When we consult on cabinet refinishing in Barrington, RI, we often see DIYers make these avoidable errors:
- Skipping the Cleaning Step: You cannot degloss over grease. The chemicals will just smear the oil around, leading to “fish-eyes” in your paint.
- Inadequate Deglossing: If you see shiny spots after using liquid sandpaper, hit them again. Paint will not stick to a glossy surface.
- Applying Thick Coats: It’s tempting to try and finish in one coat. Don’t. Thick coats lead to drips, sags, and “alligatoring” (cracking). Three thin coats are always better than one thick one.
- Rushing the Reassembly: Even if the paint feels dry, it is still soft. If you screw the hinges back on too early, you might mar the finish or cause the doors to stick to the frames.
- Forgetting to Label: It seems easy to remember which door goes where… until you have 25 identical-looking white doors leaning against your garage wall. Labeling is a lifesaver.
When to Hire a Professional for Your Cabinet Makeover
While the “no-strip” method is DIY-friendly, achieving a truly flawless, factory-like finish requires precision and specialized equipment. At Smyth Painting Co., we bring nearly two decades of experience to every kitchen in Rhode Island and SE Massachusetts.
We understand the nuances of different wood types—from the heavy grain of 1990s oak to the smooth veneer of modern maple. We use professional-grade, low-VOC (eco-friendly) coatings that offer superior durability and minimal odor, so you don’t have to leave your home during the process.
Our team serves the entire region, including Newport, Tiverton, Little Compton, Bristol, and Warren. We take the stress out of the project by handling the meticulous masking, professional spraying, and precise reinstallation. If you want the “like-new” look without the “I-did-it-myself” imperfections, our cabinet refinishing services are the perfect solution.
Professional Results and Final Considerations
Refinishing your cabinets is the single most impactful change you can make to your kitchen’s aesthetics. By choosing to refinish cabinets without stripping, you are making an environmentally conscious and fiscally responsible decision.
Cost vs. Replacement Replacing cabinets is a massive undertaking that often involves plumbing, electrical work, and new countertops. Refinishing usually costs a fraction of a full replacement while providing the same visual “wow” factor. It’s a smart investment for homeowners looking to increase their property value in competitive markets like Narragansett, Wickford, or North Kingstown.
Maintenance Tips To keep your newly refinished cabinets looking spectacular:
- Wait at least 14 days before using any harsh household cleaners; the paint needs time to fully “cure” and reach maximum hardness.
- Clean spills immediately with a damp microfiber cloth.
- Avoid using abrasive scouring pads, which can dull the sheen over time.
Whether you decide to tackle this as a weekend DIY project or bring in the experts at Smyth Painting Co. for a professional wood refinishing touch, the “no-strip” method is the fastest path to the kitchen of your dreams. You don’t need a sledgehammer to transform your home—sometimes, all you need is a little “Cabinet Makeover Magic.”


