
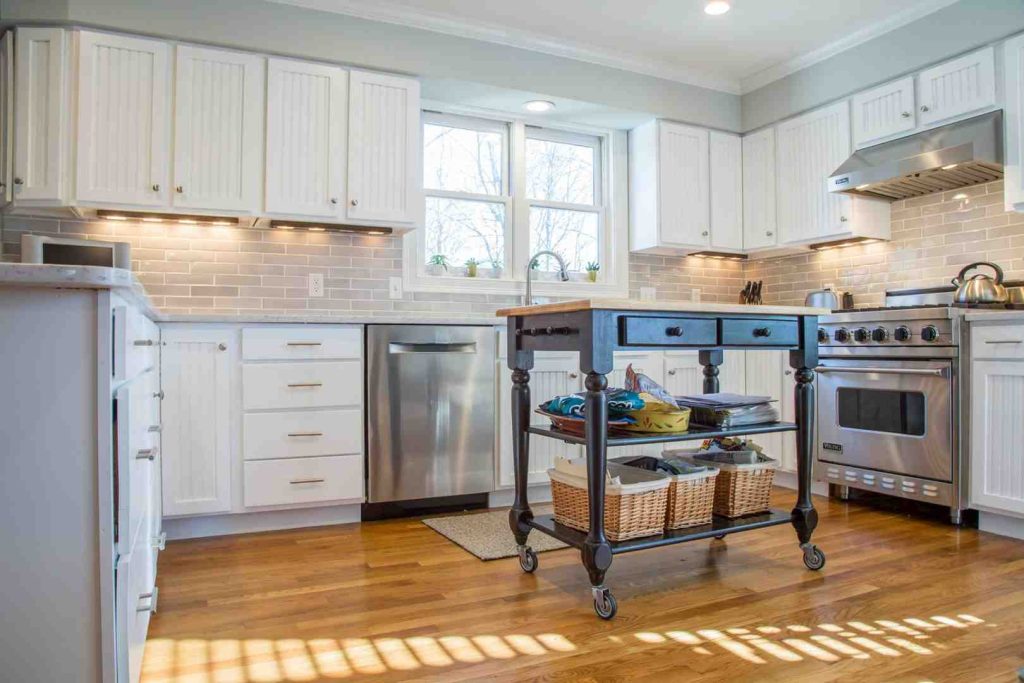
Why Kitchen Cabinet Stripping and Refinishing Transforms Your Kitchen
Kitchen cabinet stripping and refinishing is the process of removing old paint or stain from your cabinets, preparing the wood surface, and applying a fresh finish to restore their beauty. This approach offers significant savings compared to full cabinet replacement while giving you complete control over the final color and appearance.
Quick Overview: What You Need to Know
- Stripping: Removes old finish using chemical strippers or sanding
- Refinishing: Applies new stain, paint, or clear coat to bare wood
- Timeline: 3-7 days for DIY projects; 1-2 days with professionals
- Best For: Solid wood cabinets in good structural condition
- Cost Savings: Significant savings compared to replacement
If your kitchen looks worn but the cabinet boxes are still solid, you’re facing a common question: replace everything or give them new life? The answer often lies in the wood itself. Older cabinets frequently contain higher-quality solid wood that newer options lack, making them worth saving.
Cabinet stripping reveals what’s underneath years of cooking grease, multiple paint layers, and daily wear. Once you remove that buildup, you can choose to go lighter (with aggressive stripping and bleaching), darker (often simpler with tinted polyurethane), or switch to paint entirely. Each path requires different tools, techniques, and time commitments.
The process involves real challenges: chemical fumes, intricate sanding on raised panels, and the risk of blotchy staining if you rush. But it also offers real rewards—a kitchen that feels brand new at a fraction of replacement cost.
I’m Douglas Smyth, founder of Smyth Painting Company, where we’ve been transforming Rhode Island kitchens since 2005 through expert cabinet refinishing and interior wood restoration. Over nearly two decades, I’ve guided countless homeowners through kitchen cabinet stripping and refinishing projects, helping them make informed decisions about when DIY makes sense and when professional expertise delivers better long-term results.

Stripping vs. Refacing vs. Painting
When we talk about updating a kitchen, the terminology can get confusing. Are you “refacing” or “refinishing”? The difference matters for both your budget and the final look of your home in Narragansett or Newport.
| Method | What It Involves | Best For | Material Preservation |
|---|---|---|---|
| Stripping & Refinishing | Removing all old finish back to bare wood and applying new stain/topcoat. | High-quality solid wood you want to showcase. | High – preserves the original wood. |
| Painting | Cleaning, priming, and applying opaque color over the existing surface. | Hiding grain or changing to a solid color like white or navy. | Moderate – covers the wood grain entirely. |
| Refacing | Keeping the boxes but replacing doors and drawer fronts with new ones. | When doors are damaged or outdated in style. | Low – replaces the most visible parts. |
| Replacement | Tearing out everything and installing new boxes and doors. | Total layout changes or structurally unsound cabinets. | None – everything is new. |
Kitchen cabinet stripping and refinishing is the most cost-effective way to preserve the soul of your kitchen. If you have beautiful oak, cherry, or maple cabinets that have simply been hidden under layers of 1990s grime or “landlord teal” paint, stripping them back to their natural state is incredibly rewarding. It allows you to retain high-quality materials that would be prohibitively expensive to buy new today.
For those who want to keep the wood look but need a color shift, More info about cabinet refinishing can help you decide if your current wood species is a good candidate for a total color transformation.
Essential Tools for Kitchen Cabinet Stripping and Refinishing
Before you dive in, you need the right “arsenal.” We’ve seen many DIYers start with a single sheet of sandpaper and a dream, only to realize halfway through that they’re in for a marathon. To get professional results in your Bristol or Jamestown kitchen, you need these essentials:
- Chemical-Resistant Gloves: Standard dish gloves will melt. You need heavy-duty nitrile or neoprene.
- Respirator for safety: Chemical strippers and fine wood dust are no joke. A NIOSH-approved respirator is mandatory.
- Shave Hook Tool: This is the “secret weapon.” A shave hook scraping tool has a triangular or curved head that gets into the grooves of raised panel doors where flat scrapers can’t reach.
- Orbital Sander: For the flat surfaces of the doors and frames.
- Sandpaper Grits: You’ll need a progression—100 grit for initial smoothing, 150 for middle-ground, and 220 for the final “butter-smooth” finish.
- Tack Cloth: A sticky cheesecloth used to pick up every last microscopic speck of dust before you apply the finish.
- Mineral Spirits: Essential for cleaning the wood after stripping and for thinning certain oil-based finishes.
- Synthetic-Bristle Brushes: Specifically for applying strippers and modern water-based topcoats.
The Process of Kitchen Cabinet Stripping and Refinishing

The heart of the project is the stripping phase. This is where the magic (and the mess) happens. When we perform kitchen cabinet stripping and refinishing for our clients in Portsmouth or Tiverton, we emphasize that the finish is only as good as the preparation.
Safety First
Most effective chemical strippers contain powerful solvents. Always work in a well-ventilated area—ideally outdoors or in a garage with the door open and fans running. If you are working on cabinets in a home built before 1978, be aware of lead paint risks. Removing lead-based paint requires specific containment protocols to keep your family safe.
Solid Wood vs. Veneer
Before you apply a drop of stripper, determine what you’re working with. Solid wood can handle aggressive stripping and sanding. However, many modern cabinets use a thin wood veneer over particle board. If you sand too hard on a veneer, you will “burn through” to the substrate, which cannot be fixed with stain. Laminate cabinets (plastic-coated) generally cannot be stripped and stained; they are better candidates for specialized bonding primers and paint.
Step-by-Step Guide to Stripping Cabinet Doors and Frames
1. The Labeling System
Do not skip this! Remove all doors, drawer fronts, and hardware. Use numbered masking tape to label each door and its corresponding opening (e.g., “Upper 1”, “Lower 4”). Put all hinges and screws into labeled baggies. There is nothing worse than finishing a beautiful refinishing job only to realize the doors don’t quite hang right because the hinges got swapped.
2. Apply the Stripper
We recommend a high-quality product like Gaudreault paint stripper, which is known for being non-flammable and effective on multiple layers. Apply a thick, generous coat with an old brush. Do not “paint” it on thin; you want a gloppy layer that stays wet.
3. The Wax Paper Technique
Here is a professional tip: after applying the stripper, cover the surface with wax paper or plastic wrap. This prevents the chemicals from evaporating, forcing them to work deeper into the paint or varnish. Let it sit for the time recommended on the can—usually 15 to 30 minutes—until you see the finish wrinkling and bubbling.
4. The Big Scrape
Using a stiff scraper, gently lift the sludge. For the flat parts, a wide scraper works best. For the intricate profiles of raised panels, use your shave hook. If paint is stuck in deep crevices, a small dental pick or a stiff brass brush can help clear the “gunk.”
Preparing and Sanding for a Flawless Finish
Once the old finish is gone, the wood will likely feel “furry” or tacky. This is normal.
Neutralizing and Cleaning
Some strippers require a wash with mineral spirits or a specific neutralizer to stop the chemical reaction. Check your product label. After neutralizing, we recommend washing the cabinet frames (which are still in the kitchen) with a TSP (Trisodium Phosphate) solution to remove years of invisible cooking grease that can prevent your new finish from sticking.
The Sanding Progression
Sanding is where you truly find the wood’s beauty.
- Start with 100 or 120 grit to remove any remaining bits of finish and smooth out the grain.
- Move to 150 grit to erase the scratches left by the coarser paper.
- Finish with 220 grit. Pro Tip: Always sand in the direction of the wood grain. Sanding across the grain creates “swirl marks” that will show up vividly once you apply stain.
Patching
If you find old hardware holes or deep gouges, now is the time to use a high-quality wood filler. If you plan to stain the wood, make sure the filler is “stainable”—though be warned, filler never takes stain exactly like real wood.
Best Methods for Kitchen Cabinet Stripping and Refinishing
Now comes the fun part: choosing your new look.
Staining vs. Painting Staining highlights the natural character of the wood. If you’ve gone through the trouble of stripping back to bare wood, a beautiful semi-transparent stain is the best way to show off your hard work. Painting is a great choice if the wood underneath turned out to be less attractive than expected or if you want a modern, high-contrast look.
Can You Lighten Dark Cabinets? Yes, but it’s the hardest path. Going from a dark espresso to a light “white oak” look requires very deep stripping and sometimes the use of wood bleach (oxalic acid) to remove the pigments embedded in the wood fibers. It’s a labor of love, but the results can be stunning.
Tinted Polyurethane If you want to go darker without a full strip-to-bare-wood process, you can sometimes use a tinted polyurethane. This adds color and a topcoat in one step. However, for a truly professional, high-end look in a home in Little Compton or Wickford, a full strip and traditional stain is always superior.
Sealing and Topcoats The kitchen is a harsh environment. Your cabinets face steam, grease, and flying pasta sauce. We recommend at least two coats of a high-quality clear polyurethane or a urethane-alkyd enamel. Between coats, lightly sand with 220 grit and wipe with a tack cloth to ensure the smoothest possible surface. For more specialized needs, explore our interior wood refinishing services.
When to Hire a Professional vs. DIY
We love the DIY spirit, but kitchen cabinet stripping and refinishing is arguably the most labor-intensive project a homeowner can take on.
The DIY Reality Check
- Time: A typical kitchen can take a DIYer 60 to 100 hours of active labor. That’s a lot of weekends.
- The Mess: Stripping is inherently messy. Without professional-grade dust extraction and floor protection, that “sludge” and dust can migrate throughout your home.
- The Finish: Achieving a “factory-smooth” finish without brush marks is difficult with a standard hardware store brush. Professionals often use HVLP (High Volume Low Pressure) sprayers in a controlled environment to get that flawless look.
The Smyth Painting Co. Advantage When you work with us in South Kingstown, Exeter, or across Aquidneck Island, we take the stress out of the process. We provide:
- Expert Communication: You’ll know exactly what’s happening every day of the project.
- Eco-Friendly Options: We use low-VOC finishes that are safer for your family and pets.
- Durability: Our professional-grade topcoats are designed to last for years, often backed by warranties that DIY projects simply can’t match.
- Speed: What takes a homeowner weeks, we can often complete in a fraction of the time, getting your kitchen back in service faster.
If you’re in the Providence area and want to see how a professional team handles these transformations, check out our professional cabinet refinishing in Providence.
Conclusion
Successfully completing a kitchen cabinet stripping and refinishing project is one of the most satisfying home improvements you can make. It’s a true transformation that honors the original craftsmanship of your home while updating it for modern tastes.
To keep your “new” cabinets looking their best:
- Prevent Sticking: When painting or refinishing, never coat the sides or undersides of drawers where they contact the frame. This causes sticking and peeling. Only finish the drawer fronts.
- Gentle Cleaning: Use a damp microfiber cloth with a drop of mild dish soap. Avoid harsh chemicals or scouring pads that can dull the topcoat.
- Wait for the Cure: Most finishes feel dry in hours but take 30 days to “cure” to their full hardness. Be extra gentle during that first month.
Whether you decide to tackle this project yourself with a shave hook and a respirator or prefer to let a professional team handle the heavy lifting, the result will be a kitchen that feels refreshed, valuable, and uniquely yours. If you’re ready to explore the possibilities for your home, Read More About Cabinet Refinishing to see how we can help you achieve the kitchen of your dreams.


